Don’t Let a Throwing Injury End Your Season: A PT’s 2026 Roadmap to Recovery
This guide covers everything about Rehabilitation Strategies for Throwing Injuries: A Physical Therapist's Perspective. This guide covers everything about Rehabilitation Strategies for Throwing Injuries: A Physical Therapist's Perspective. This guide covers everything about Rehabilitation Strategies for Throwing Injuries: A Physical Therapist's Perspective. This guide covers everything about Rehabilitation Strategies for Throwing Injuries: A Physical Therapist's Perspective. This guide covers everything about Rehabilitation Strategies for Throwing Injuries: A Physical Therapist's Perspective. This guide covers everything about Rehabilitation Strategies for Throwing Injuries: A Physical Therapist's Perspective.
This guide covers everything about Rehabilitation Strategies for Throwing Injuries: A Physical Therapist's Perspective. This guide covers everything about Rehabilitation Strategies for Throwing Injuries: A Physical Therapist's Perspective. This guide covers everything about Rehabilitation Strategies for Throwing Injuries: A Physical Therapist's Perspective.
This guide covers everything about Rehabilitation Strategies for Throwing Injuries: A Physical Therapist's Perspective. This guide covers everything about Rehabilitation Strategies for Throwing Injuries: A Physical Therapist's Perspective. This guide covers everything about Rehabilitation Strategies for Throwing Injuries: A Physical Therapist's Perspective.
A sharp pop, a nagging ache, or a sudden loss of velocity these are the unwelcome signs that can sideline any athlete who relies on their arm. For pitchers, quarterbacks, and even tennis players, throwing injuries are a frustrating reality. But as of May 2026, the world of sports medicine offers more sophisticated and effective rehabilitation strategies than ever before; from a physical therapist’s viewpoint, getting you back on the field safely and strongly is a multi-stage journey, not a quick fix.
Last updated: May 5, 2026
Key Takeaways
- Early, accurate diagnosis is crucial for effective rehabilitation strategies for throwing injuries.
- Rehab progresses through distinct phases: pain management, regaining range of motion, strength building, and sport-specific training.
- A physical therapist guides personalized programs focusing on biomechanics, strength, flexibility, and neuromuscular control.
- Preventing re-injury involves ongoing maintenance, proper warm-up/cool-down routines, and understanding your body’s limits.
- Returning to throwing is a gradual process, often following a structured protocol to ensure full recovery.
Understanding the Root Cause: Why Did This Happen?
Before diving into exercises, a physical therapist (PT) will meticulously assess the why behind your injury. Was it a sudden traumatic event, or a gradual onset due to overuse? Common culprits include poor biomechanics (how you move your body), muscle imbalances (some muscles are too tight or too weak), inadequate conditioning, and insufficient rest; for instance, a pitcher might compensate for a weak rotator cuff by over-stressing their elbow, leading to UCL (ulnar collateral ligament) issues. Identifying these root causes is the first, and arguably most critical, step in crafting a successful rehabilitation strategy.
Phase 1: Taming the Pain and Inflammation
The initial phase of rehabilitation is all about controlling pain and reducing inflammation. This might involve rest from the aggravating activity, ice, and sometimes modalities like ultrasound or electrical stimulation. Your PT will assess your pain levels and functional limitations. A common mistake here is pushing through pain too soon, which can delay healing. For example, Maya, a high school softball pitcher, felt she could still throw lightly after feeling a twinge in her shoulder. Her PT advised against it, explaining that even light throwing could aggravate the inflammation, pushing her recovery back by weeks.
Phase 2: Restoring Range of Motion and Flexibility
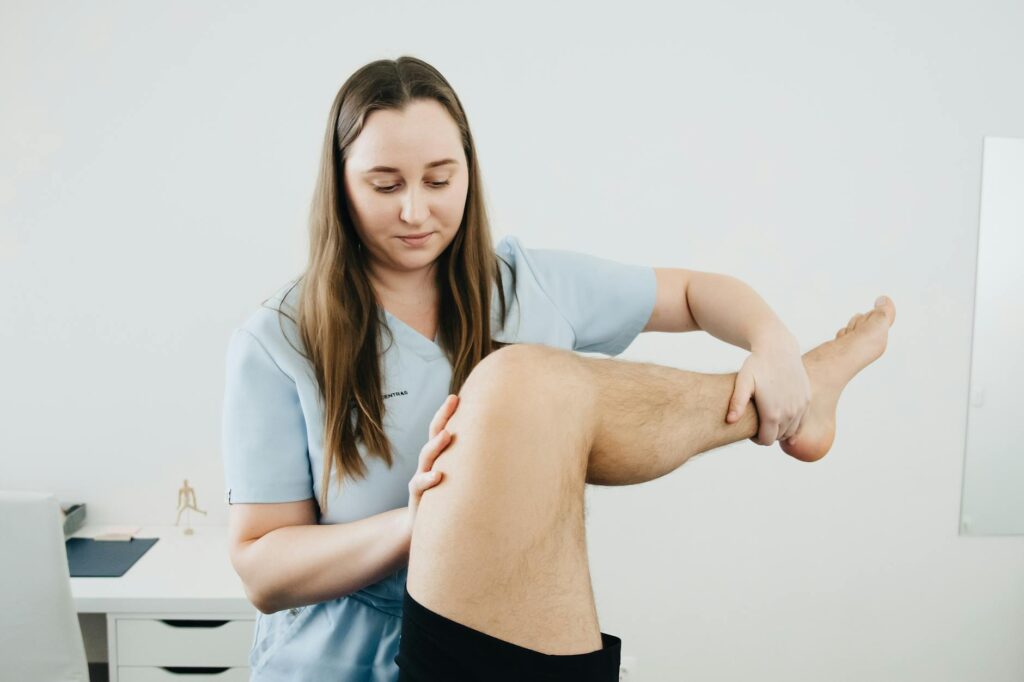
Once inflammation subsides, the focus shifts to restoring normal joint movement and flexibility. Throwing requires a wide range of motion in the shoulder and thoracic spine. Stiffness in these areas forces compensation elsewhere, increasing injury risk. Gentle stretching, manual therapy techniques (like joint mobilization performed by the PT), and specific mobility exercises are employed. It’s vital to regain this motion without pain. For example, a PT might use passive range of motion exercises, where they move the limb for the patient, before progressing to active-assisted and then active movements.
From a different angle: Flexibility isn’t just about stretching muscles; it’s also about the health of joint capsules and connective tissues. PTs use techniques to improve the glide and movement of these structures, ensuring your shoulder and elbow can move through their full, pain-free arcs.
Phase 3: Building Strength and Stability
This is where the real rebuilding happens. We focus on strengthening the muscles that were either injured or became weak due to the injury and compensatory patterns. This includes the rotator cuff muscles (infraspinatus, infraspinatus, teres minor, subscapularis), scapular stabilizers (like the rhomboids and serrates anterior), and core muscles. Strength training is highly individualized. A PT will design a program that starts with light resistance, often focusing on isometric contractions (muscle contraction without joint movement), and progresses to isotonic exercises (using resistance bands, light weights) and then functional strength training.
Practically speaking: We often use exercises like external rotation with resistance bands, rows for scapular stability, and planks for core engagement. The key is to activate the correct muscles and ensure proper form to avoid re-injuring yourself. According to the National Strength and Conditioning Association (NSCA) (2024), proper progression in resistance training is crucial for athletes to regain strength without risking further damage.
Phase 4: Neuromuscular Control and Proprioception
Beyond just strength, your ability to control your movements (neuromuscular control) and know where your limb is in space (proprioception) is paramount for throwing. This phase integrates exercises that challenge your body’s coordination and balance. Think single-leg stands, throwing a ball against a wall with precise control, or exercises that require rapid adjustments. This helps retrain your brain-body connection, vital for the complex, high-speed motion of throwing. For example, a PT might have an athlete perform controlled throwing motions with a lighter ball or even a dowel rod to focus on the kinetic chain of movement, ensuring energy transfers efficiently from the legs through the core to the arm.
Phase 5: The Gradual Return to Throwing
This is often the most anticipated phase. The return to throwing is a carefully managed, progressive process; it’s not about picking up where you left off. PTs typically use a structured ‘return to throwing’ protocol. This starts with short, easy tosses at low intensity and gradually increases distance, intensity, and the number of throws over several weeks.
Crucially, pain is the ultimate guide. If pain returns at any stage, the athlete must regress to the previous pain-free level. For instance, a protocol might start with throwing 30 feet for 15–20 repetitions, then progress to 60 feet, then 90 feet, before introducing breaking balls or higher velocity throws.
What this means in practice: This phase requires immense patience. Athletes are eager to get back to full performance, but rushing can lead to re-injury. A PT acts as the gatekeeper, ensuring each step is safe and effective. The American Physical Therapy Association (APTA) emphasizes patient education and adherence to protocols as critical components of successful return-to-sport strategies (2025).
Sport-Specific Training and Injury Prevention
Once you can throw pain-free at or near your previous levels, the focus broadens to ensuring you can do so repeatedly and without re-injury. This involves sport-specific drills that mimic the demands of your sport. It also includes developing a long-term injury prevention plan. This plan typically includes a consistent warm-up routine before activity, a cool-down and stretching session afterward, and ongoing strength and conditioning exercises. Understanding proper mechanics, managing pitch counts (especially for young athletes), and listening to your body are key. The International Journal of Sports Physical Therapy (2023) highlights that complete injury prevention programs can significantly reduce the incidence of throwing-related injuries.
Common Mistakes to Avoid on Your Rehab Journey
Several pitfalls can derail your recovery. The most common is impatience pushing too hard, too soon, or skipping steps. Another is neglecting the ‘why’ and only focusing on ‘doing’. If the underlying biomechanical issue or muscle imbalance isn’t addressed, the injury is likely to recur. Ignoring pain signals is also a major red flag; pain is your body’s way of telling you something is wrong. Finally, failing to transition properly back to sport-specific activities can lead to setbacks.
When to Seek Professional Help
If you experience any sharp pain, persistent ache, significant loss of strength or range of motion, or a noticeable decrease in performance related to throwing, it’s time to see a physical therapist. Early intervention is key. Delaying treatment can turn a manageable issue into a chronic problem or require more extensive interventions, potentially even surgery. As of 2026, many sports medicine clinics offer specialized throwing assessments that can pinpoint subtle issues before they become major injuries.
The Physical Therapist’s Role: Your Partner in Recovery
A physical therapist is more than just someone who gives you exercises. They’re movement experts who diagnose, treat, and prevent musculoskeletal conditions. For throwing injuries, they bring a deep understanding of the complex biomechanics involved, the specific demands of overhead athletes, and the stages of tissue healing. They provide a personalized treatment plan, manual therapy, therapeutic exercise, and crucial guidance on when and how to return to your sport. They also collaborate with coaches, trainers, and physicians to ensure a complete approach to your health and performance.
Frequently Asked Questions
What is the first step in rehabilitating a throwing injury?
The first step is accurate diagnosis by a healthcare professional, typically a physical therapist or sports medicine doctor, to understand the exact nature and cause of the injury.
How long does throwing injury rehabilitation typically take?
Recovery times vary greatly depending on the severity of the injury, but a typical throwing injury rehabilitation program can range from 6 weeks for minor strains to 6–12 months or longer for severe tears requiring surgery.
Can I continue to throw lightly while rehabbing?
Generally, no. Light throwing is usually part of a later rehabilitation phase. Continuing to throw while experiencing pain or during the initial inflammatory stages can worsen the injury and significantly delay recovery.
What are the most common throwing injuries?
Common throwing injuries include rotator cuff tears or impingement, labral tears, elbow ligament sprains (like UCL tears), and muscle strains of the shoulder, arm, or forearm.
How do I prevent future throwing injuries?
Prevention involves maintaining proper throwing mechanics, consistent strength and conditioning, adequate warm-up and cool-down routines, managing workload (like pitch counts), and listening to your body’s signals.
What is the role of a physical therapist in baseball pitcher rehab?
A physical therapist guides pitchers through a structured recovery process, focusing on restoring range of motion, strength, neuromuscular control, and safe return to pitching, while also addressing underlying biomechanical issues.
Last reviewed: May 2026. Information current as of publication; pricing and product details may change.
Source: ESPN
Editorial Note: This article was researched and written by the Afro Literary Magazine editorial team. We fact-check our content and update it regularly. For questions or corrections, contact us.